Off-Season Strength
OFF-SEASON STRENGTH: 9 MOVES FOR RUNNERS AND HIKERS A simple home strength programme to build resilience over the winter. The off-season is the best time to build strength. You’re not

OFF-SEASON STRENGTH: 9 MOVES FOR RUNNERS AND HIKERS
A simple home strength programme to build resilience over the winter.
The off-season is the best time to build strength. You’re not tapering or recovering from races, so you can put real work in without it impacting your running. Just two short sessions a week will make you more resilient on descents, stronger on climbs and less likely to pick up the niggles that derail spring training.
WHY STRENGTH TRAINING MATTERS
Running and hiking are repetitive. Every stride loads your muscles, tendons and joints with several times your body weight, thousands of times per run. Most overuse injuries happen when that load outpaces what your body can tolerate and adapt to. Strength training raises that ceiling: stronger muscles absorb more of the impact, tendons become stiffer and more resilient, and you hold good form for longer when you’re tired.
It also makes you more efficient. Stronger legs produce more force with each step, so a given pace or climb costs you less energy. For hikers, it means carrying a pack up and down hills with less fatigue and more control.
The programme below covers every major way your body moves: squatting, hinging, single-leg work, pushing, pulling, resisting rotation, carrying and stabilising the trunk. It also includes targeted work for the lower legs, where runners most often get hurt. The gym is the ideal space to build strength as you can utilise heavier weights and a greater range of exercises but you can still get a lot of great work done in the comfort of your own home with minimal equipment.
WHAT YOU NEED
– A pair of dumbbells or a kettlebell (a backpack loaded with books or water bottles works too)
– A step or sturdy stair
– A chair or sofa
– A resistance band
HOW TO STRUCTURE YOUR SESSIONS
Do the programme twice a week, ideally on easy days or after a short run, with at least 48 hours between sessions.
Start with 5 minutes of easy movement to warm up, such as marching on the spot, leg swings and a few bodyweight squats (unless you’re completing post-run).
The exercises are grouped together. Do one set of each exercise in the group back to back (1a then 1b, for example), then rest for 60–90 seconds. Repeat until you’ve done all the sets, then move on to the next group. The last group has three exercises. Each session takes around 45 minutes.
Pairing exercises this way means one area recovers while another works, so you get more done in less time.
THE EXERCISES
1a. Goblet squat, 3 × 8–10 reps
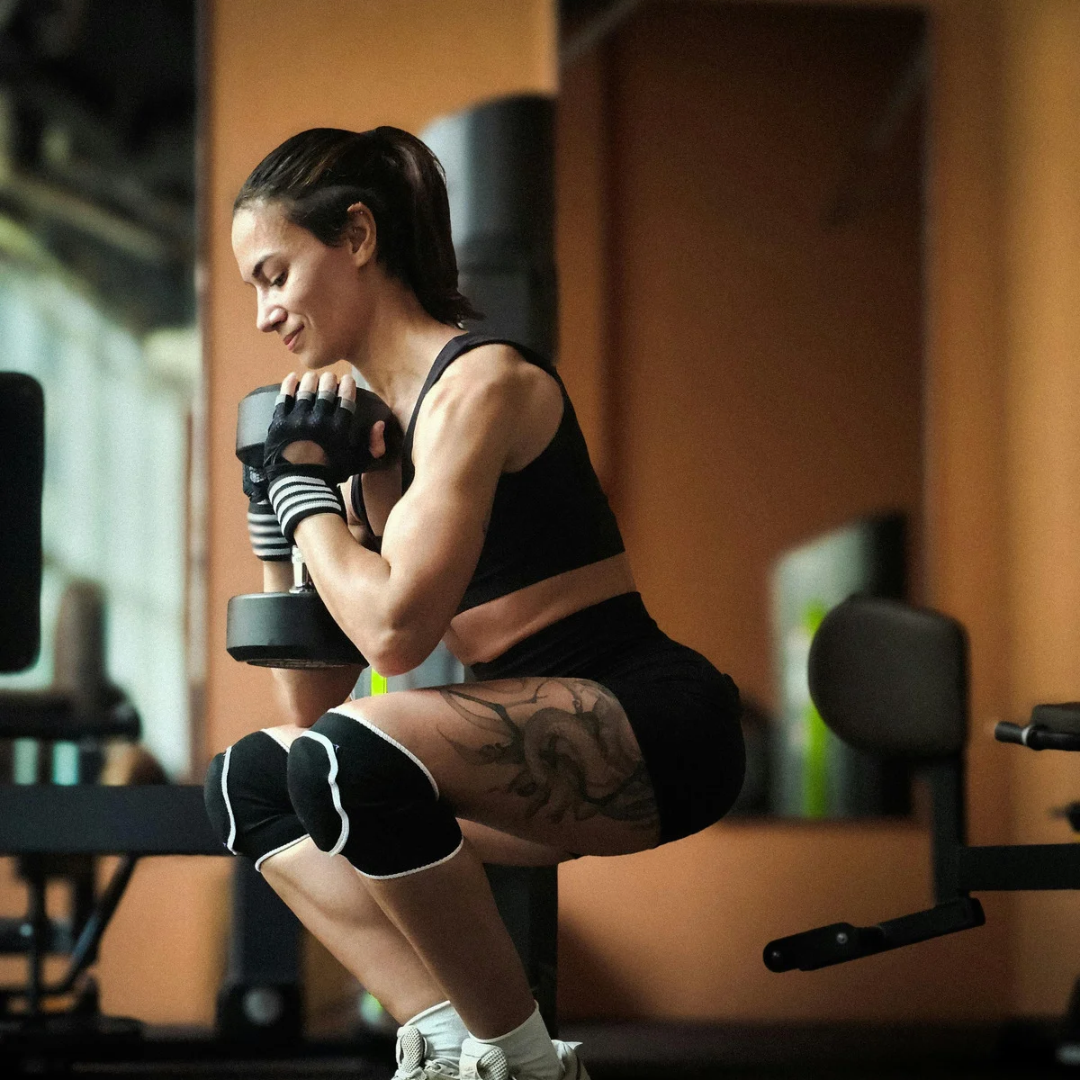
Why we do it: The squat builds strength in your quads and glutes, the muscles that power you uphill and act as shock absorbers every time your foot lands. Strong quads are particularly important for protecting your knees, because they control how much your knee bends as you take the impact of each stride. Holding the weight at your chest also keeps your torso upright and switches on your core.
Set-up: Stand with your feet just wider than hip-width and your toes turned slightly out. Hold one dumbbell or kettlebell vertically against your chest, with your elbows tucked in.
Do it: Sit down between your heels, keeping your chest up and your knees tracking over your toes. Go as deep as you can while keeping your heels down, then drive up through your whole foot.
1b. Push-up, 3 × 6–12 reps
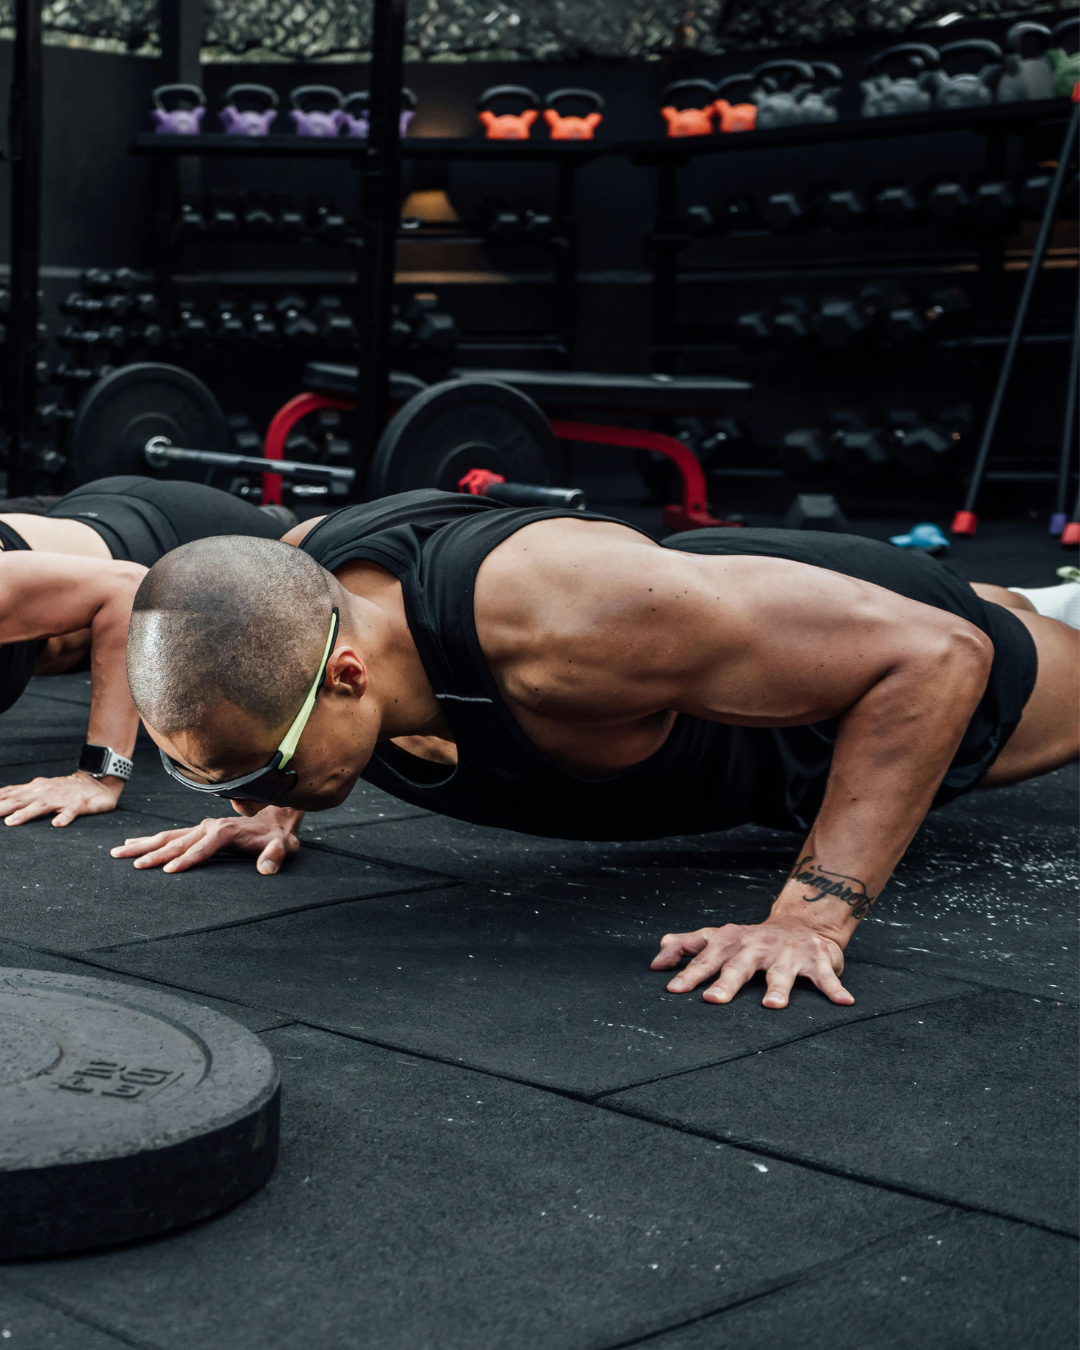
Why we do it: Runners and hikers often neglect the upper body, but your arms and shoulders drive your rhythm, and your trunk has to stay stiff to transfer force from your legs. The push-up builds strength through the chest, shoulders and arms while training your body to hold a straight, braced position. That helps you keep good posture late in a long run, and it’s useful when you’re scrambling or using poles.
Set-up: Start in a plank on the floor with your hands just wider than your shoulders and your body in a straight line from head to heels. If you can’t yet manage 6 good reps, put your hands on a kitchen worktop, table edge or stair to make it easier, or put your knees down.
Do it: Lower your chest towards the floor, or the edge, with your elbows at about 45° to your body, then push back up. Keep your hips from sagging. If you’re using a raised surface, work down to lower ones until you’re on the floor. If floor push-ups are already easy, slow the lowering to 3 seconds or rest your feet on a step.
2a. Single-leg Romanian deadlift, 3 × 8 reps each leg
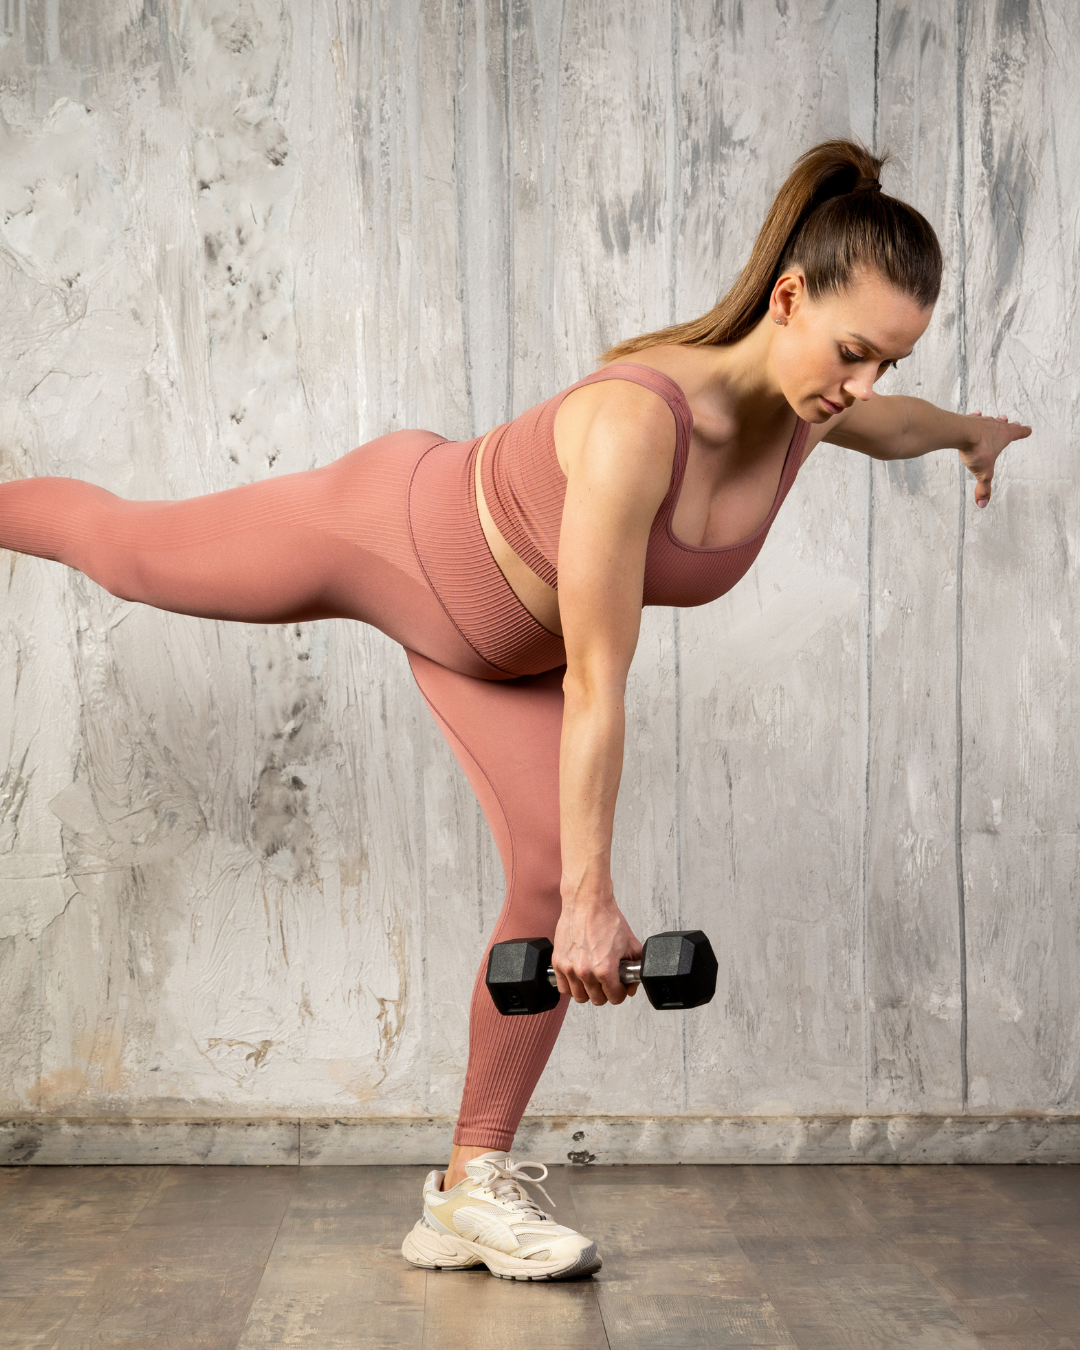
Why we do it: This is a hip hinge, the movement that loads the hamstrings and glutes. These muscles drive you forward when you run and help you push up steep ground. Weak hamstrings are a common cause of strains, especially when you pick up the pace. Doing it on one leg also trains balance and the small stabilising muscles around your ankle and hip, which you rely on every time you land on uneven, rocky or muddy ground.
Set-up: Stand on your left leg with a slight bend in the knee, holding a weight in your right hand. Rest a fingertip on a wall or chair for balance if you need it.
Do it: Hinge forward at the hip and let your right leg extend behind you, keeping your back flat and your hips level. Lower the weight towards mid-shin, or until you feel a strong stretch in your hamstring, then drive your hips forward to stand tall.
2b. Single-arm dumbbell row, 3 × 8–10 reps each arm
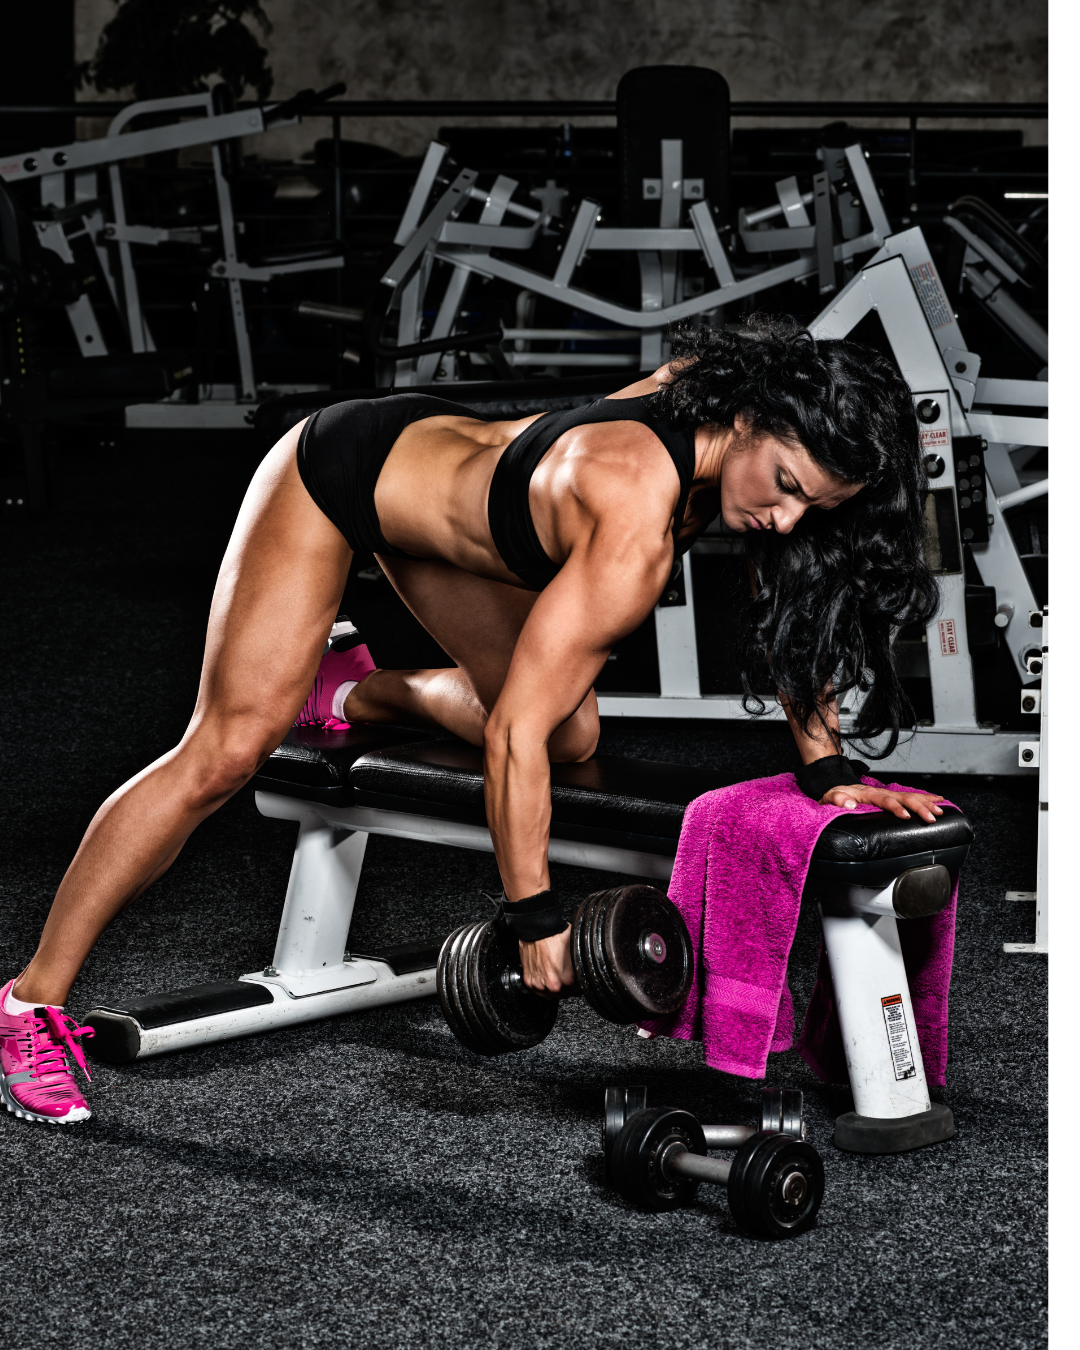
Why we do it: The row balances out the push-up by strengthening the muscles of your upper back and the back of your shoulders. Many of us spend long hours hunched at a desk, and runners tend to round forward as they tire. A strong upper back helps you stay tall, breathe freely and keep an efficient arm swing. For hikers, it’s the muscles that carry the weight of your pack.
Set-up: Put your left hand and left knee on a chair or sofa seat, with your right foot on the floor. Hold a weight in your right hand, arm hanging straight down, back flat.
Do it: Pull the weight up towards your hip, leading with your elbow and squeezing your shoulder blade back. Lower it under control without twisting your torso.
3a. Rear-foot elevated split squat, 3 × 8 reps each leg, 3 seconds down
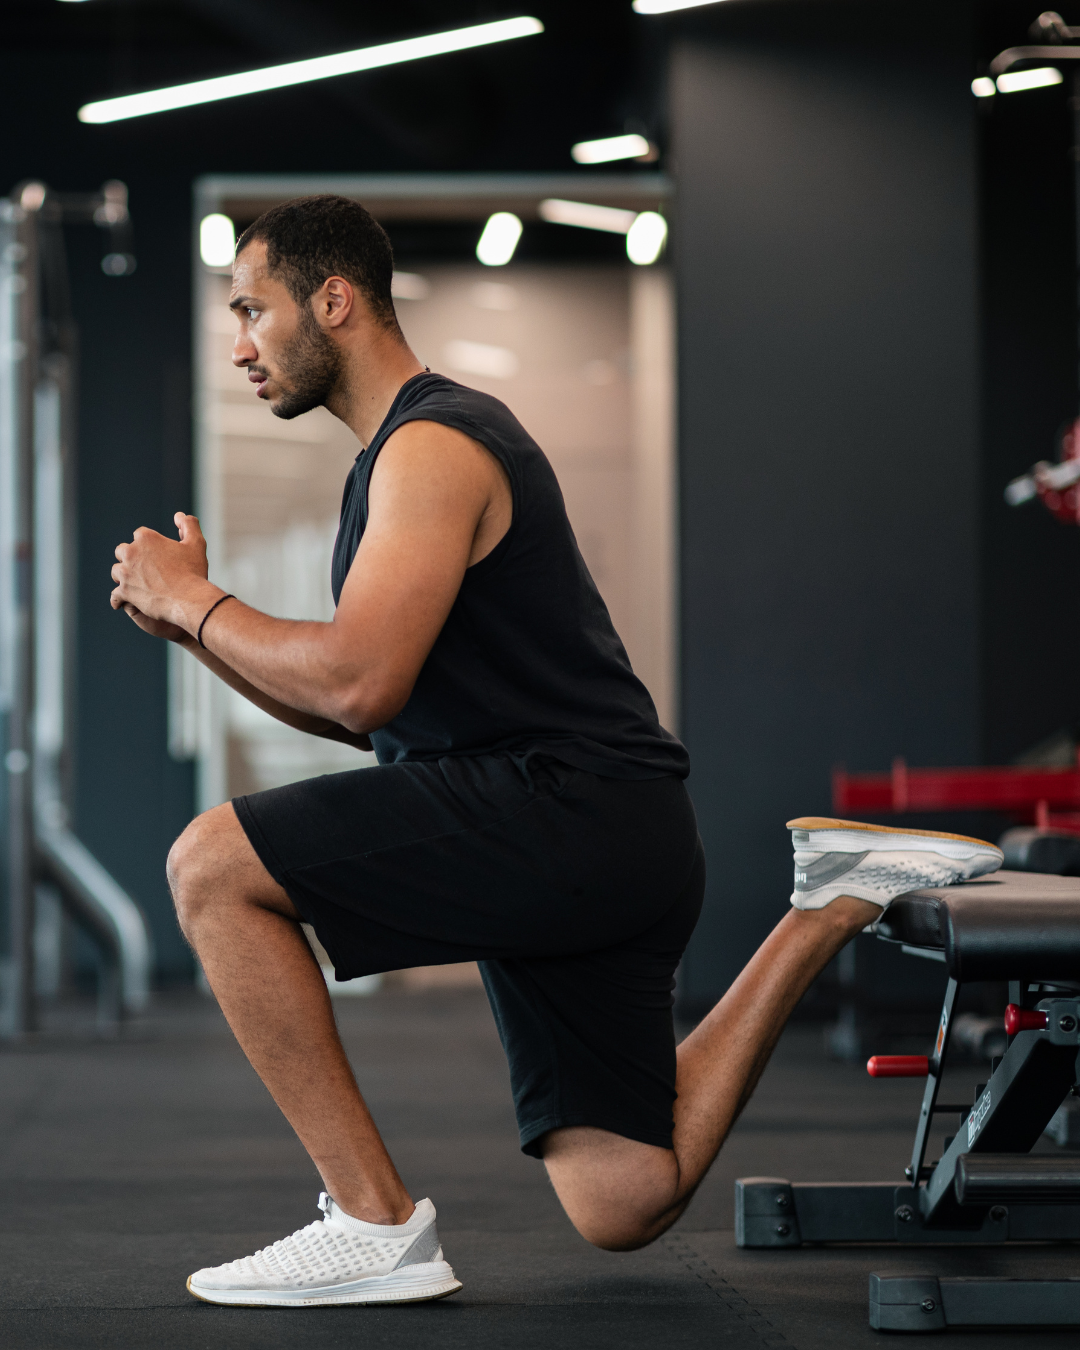
Why we do it: Running is essentially a series of single-leg hops, so single-leg strength is where the real gains are. With your back foot raised, nearly all the work goes through your front leg, building strength in the quads and glutes and exposing any imbalance between sides. The slow, 3-second lowering phase is the key part. It trains your muscles to control load as they lengthen, which is exactly what happens on descents. It’s one of the best exercises for preventing sore quads and knee pain on long downhills.
Set-up: Stand about a stride in front of a sofa, chair or low step. Rest the top of your back foot on it, and hold weights at your sides if you’re using them.
Do it: Lower slowly for a count of 3 until your back knee nearly touches the floor, keeping most of your weight on the front foot and your torso upright. Drive back up through your front heel. If your front heel lifts, move that foot further forward.
3b. Pallof press, 3 × 10 reps each side
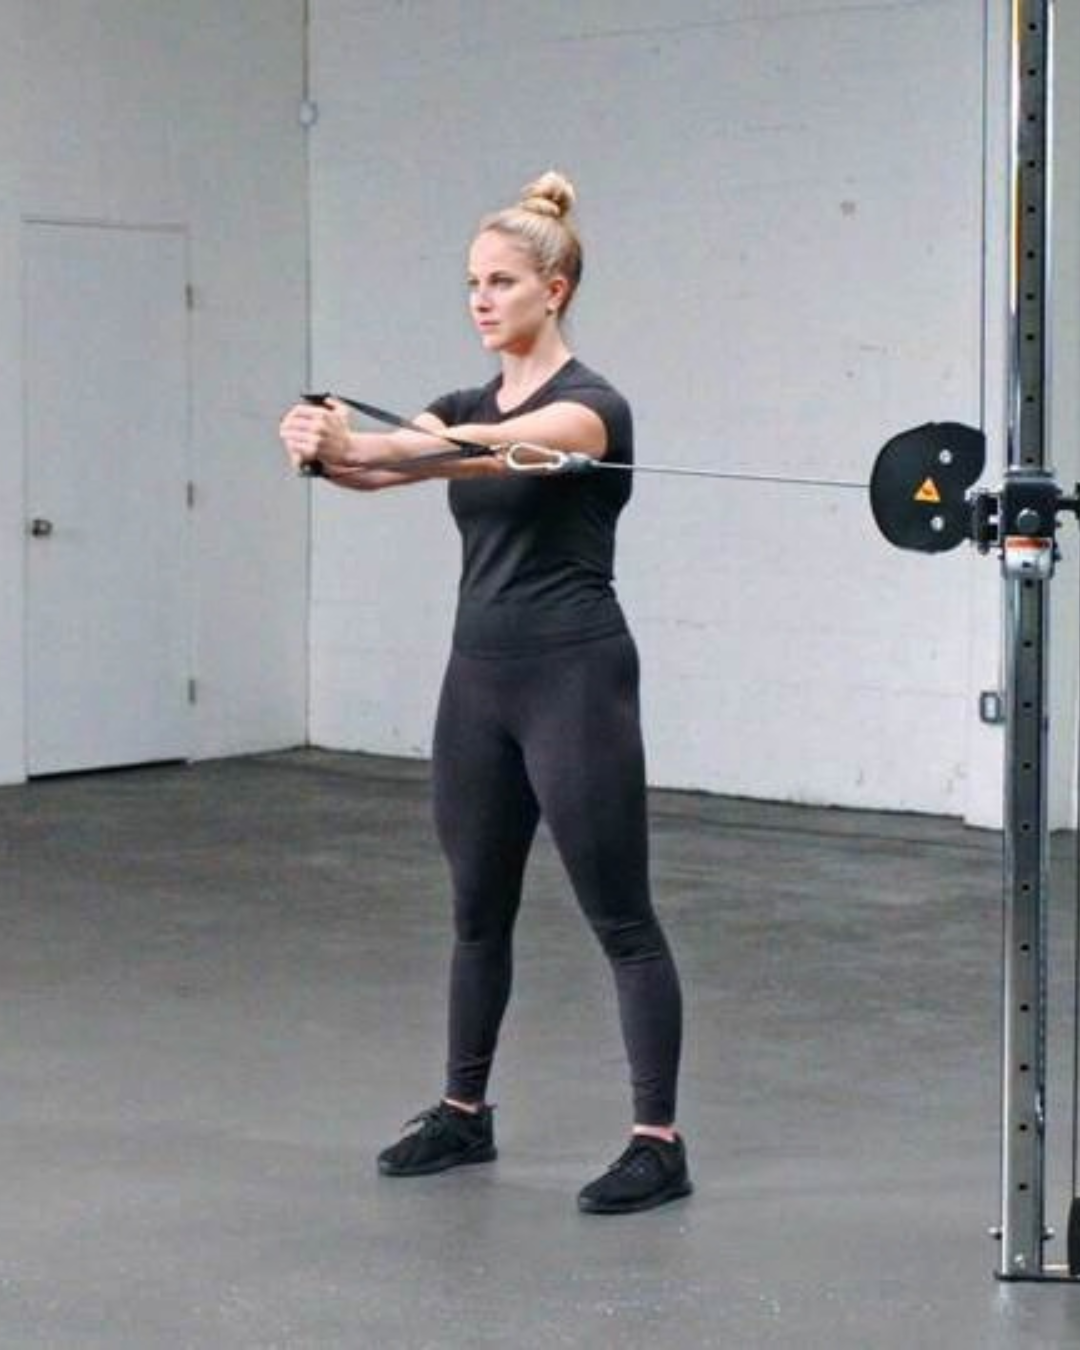
Why we do it: Your core’s main job when you run isn’t to create movement, it’s to stop unwanted movement. With every stride, your legs and arms create twisting forces through your trunk. If your core can’t resist them, energy leaks and your hips and lower back take the strain. The Pallof press trains anti-rotation: holding your trunk still while the band tries to twist you. That keeps you stable and efficient, and helps when a pack shifts or you land awkwardly on rough ground.
Set-up: Anchor a resistance band at chest height; closing it in a door on the hinge side works well. Stand side-on to the anchor, far enough away that the band is taut, with your feet hip-width apart and your knees soft. Hold the band at your chest with both hands.
Do it: Press your hands straight out in front of you and hold for 2 seconds, resisting the band’s pull to twist you towards the door. Bring your hands back to your chest. Keep your hips and shoulders square the whole time.
4a. Suitcase carry, 3 × 30–45 seconds each side
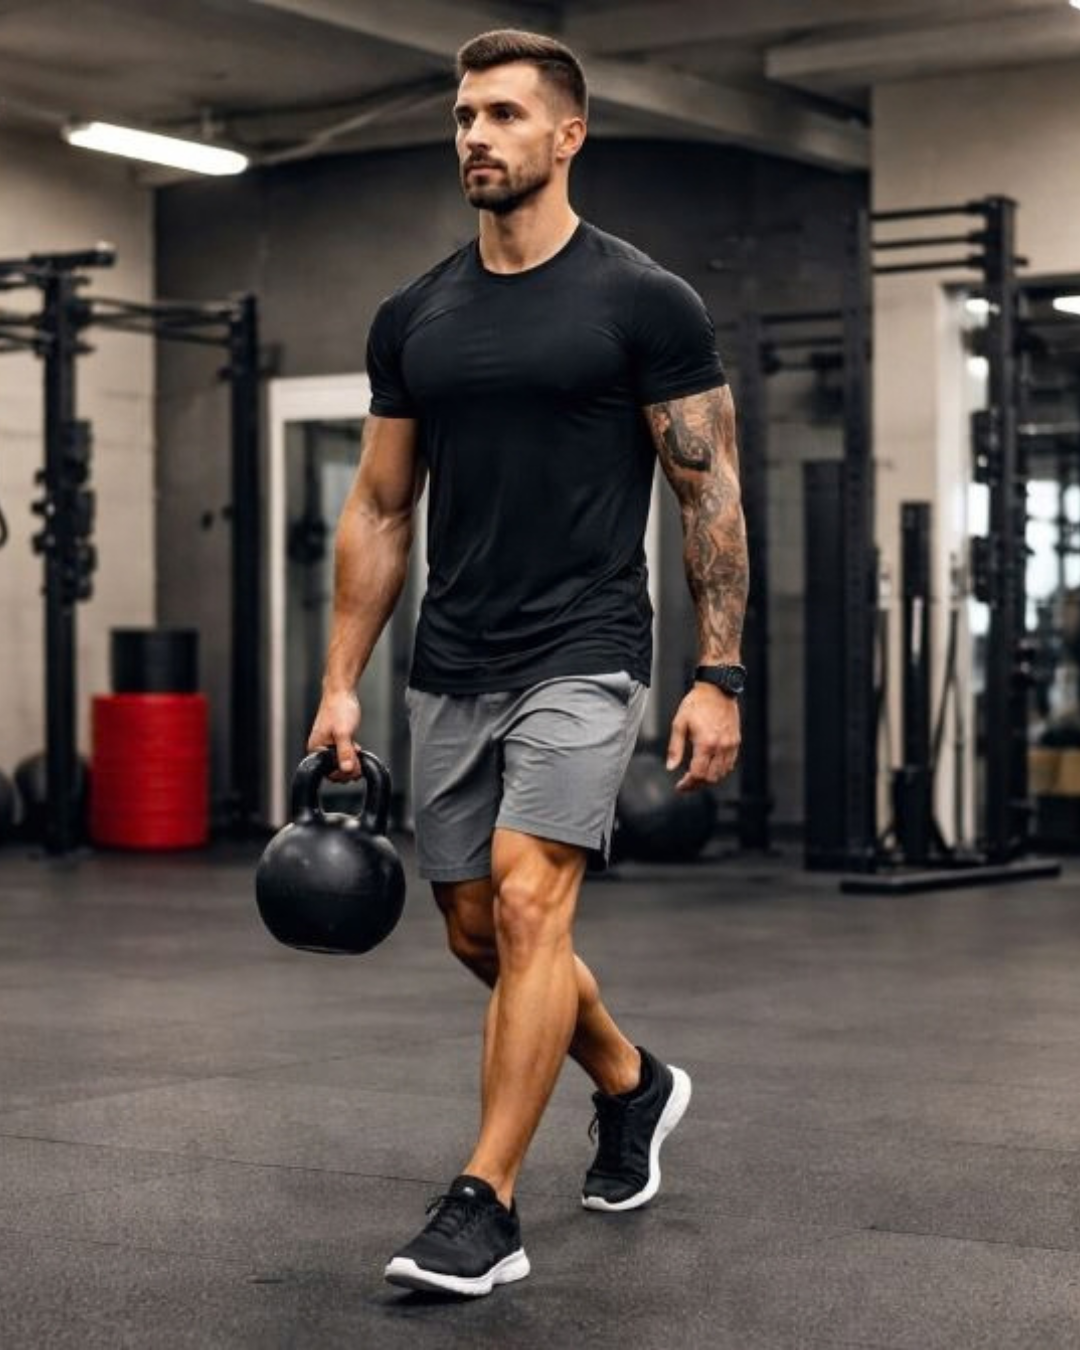
Why we do it: Carrying a weight on one side forces the muscles along the opposite side of your trunk and hip to work hard to keep you upright. This builds the side-to-side stability that stops your pelvis dropping as you land on one leg, a common contributor to knee and hip pain in runners. It also strengthens your grip and upper back, and it’s the closest thing at home to carrying a pack on the hill.
Set-up: Pick up a heavy dumbbell, kettlebell or loaded bag in one hand, like carrying a suitcase. Stand tall with your shoulders level.
Do it: Walk at a steady pace for the set time along a garden, hallway or driveway, turning when you need to. Don’t lean towards or away from the weight. Keep your ribs down and your steps controlled. Swap hands and repeat.
4b. Calf raise and tibialis raise, 3 × 15 reps of each, back to back
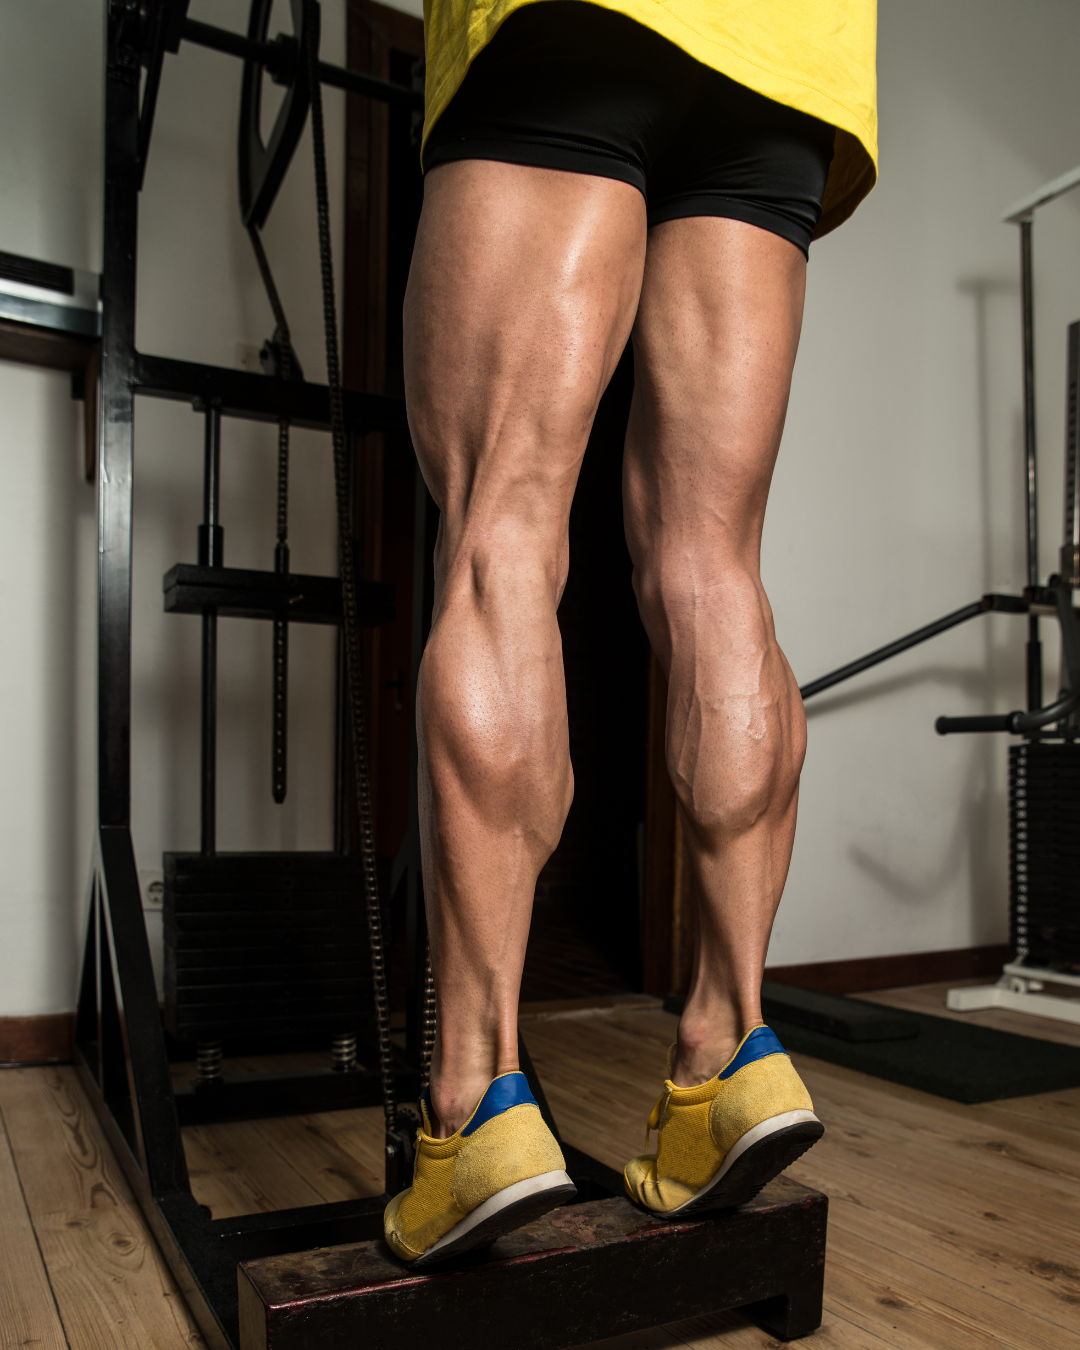
Why we do it: Your calves take more load than almost any other muscle when you run, absorbing and returning force with every step. Strong calves and Achilles tendons are some of the best protection against Achilles pain and calf strains. Doing them with straight knees targets the larger calf muscle, while bent knees targets the deeper soleus, which does a lot of work in endurance running.
The tibialis raise works the muscle on the front of your shin, which controls your foot as it lands and helps protect against shin splints. It’s often overlooked, but it’s especially useful when you’re building mileage or running downhill.
Calf raise: Stand with the balls of your feet on the edge of a stair, holding the banister for balance. Rise up onto your toes, then lower slowly until your heels drop below the step. Alternate sets between straight knees and slightly bent knees, and work up to single-leg.
Tibialis raise: Lean your back against a wall with your feet about 30–40 cm in front of you. Keep your heels down and lift your toes as high as you can, then lower them slowly.
4c. Dead bug, 3 × 8 reps each side
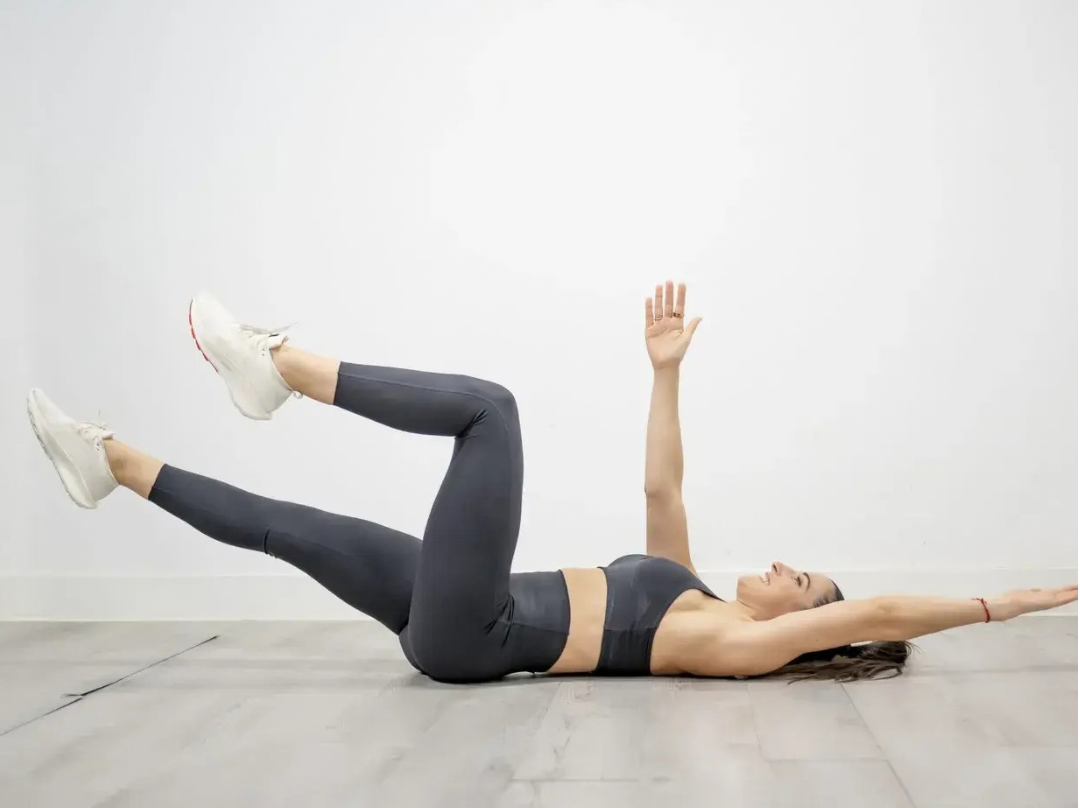
Why we do it: The dead bug trains your deep core muscles to keep your spine and pelvis steady while your arms and legs move independently, which is exactly what happens with every stride. Keeping your lower back pressed into the floor teaches you to control the arch in your lower back. That helps you hold good posture when you’re tired and can ease lower-back aches on long runs and hikes.
Set-up: Lie on your back with your arms pointing straight up at the ceiling. Lift your legs so your knees are bent at 90° and stacked over your hips. Press your lower back gently into the floor.
Do it: Breathe out and slowly lower one arm and the opposite leg (left arm and right leg) towards the floor. Keep your lower back pressed down the whole time. Only go as low as you can without your back lifting. Come back to the start and switch sides. Keep it slow and controlled, and don’t hold your breath.
HOW TO PROGRESS
Strength comes from gradually asking your body to do a little more over time. Follow this 12-week progression:
Weeks 1–3: learn the movements with light weight. Finish each set feeling you could do 3–4 more reps.
Weeks 4–8: add load, or slow the lowering phase to 3 seconds. Keep 1–2 good reps in reserve.
Weeks 9–12: go heavier with fewer reps (6–8) on the squat, deadlift and split squat.
Keep good form throughout. Some next-day muscle soreness is normal, but sharp or joint pain isn’t. If something hurts, stop that exercise and get it checked.
Once your race build-up starts, drop to one session a week. That’s enough to hold on to the strength you’ve built while you focus on your running.
FOR HIKERS
The programme works as it is. Do the split squats and carries wearing your pack, because that’s exactly the load your legs meet on the hills.
WANT MORE INFORMATION?
If you’d like strength training tailored to your goals, injury history or next race, get in touch with us in store.
OFF-SEASON STRENGTH: 9 MOVES FOR RUNNERS AND HIKERS A simple home strength programme to build resilience over the winter. The off-season is the best time to build strength. You’re not
An absolutely wild ride through the mountains of Gran Canaria “I’d never seen mud like it. Runners crawling on all fours, sliding backwards down 40% climbs, taking each other out

Nick & Anna on Schoolhouse Ridge, Ballachulish Nick & Anna, in their constant pursuit of improving their outdoor knowledge, headed up to the excellent Glenmore Lodge near Aviemore, Scotland last